1. Android 64 bit support Unity.
This Android 64-bit architecture Unity isn’t new in the Android as Lollipop (v5.0) launched in 2014 being the first to support 64 bit architecture. From the latest information of ARM it shows that more than 80% of devices shipping today are capable of 64 & 32-bit.
According to Google’s detailed information & timelines, it is confirmed that starting from 1st August 2019, all new games and apps and app updates that include native code are required to provide 64-bit versions in addition to 32-bit while publishing to Google Play.
2. Advantages of Android 64bit support Unity.
2.1 Better performance.
2.2 Enhanced security.
2.3 Greater numeric precision.
2.4 Larger addressable memory.
2.5 Richer instruction set.
3. Requirements.
To add android 64bit support to your unity games you need Unity 2018.2 or greater. Also they have backported it to Unity 2017.4 which will be supported till March 2020.
4. Create Unity project.
5. Adding android 64-bit support Unity.
5.1 Go to File->Build Settings Or Press Cmd+B in you iMac.

5.2 Select Android -> Player Settings -> Other Settings.
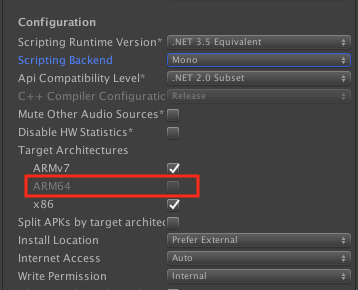
As you see in Configuration -> Target Architecture, ARM64 is disabled.
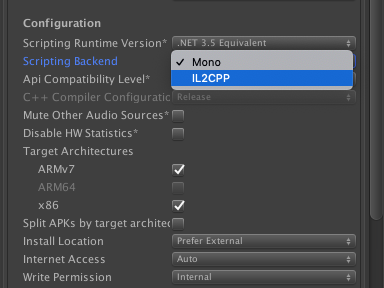
5.3 Change Scripting backed to IL2CPP instead Mono
5.4 Now you can select ARM64
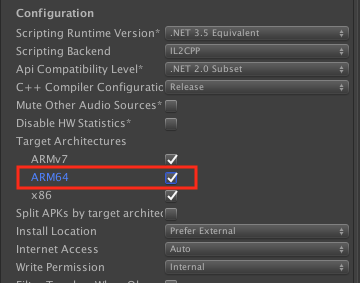
5.5 Now deselect x86 as it is no longer supported in new devices.

5.6 Go to Edit -> Build Setings -> Android -> Select Build App Bundle (Google Play).

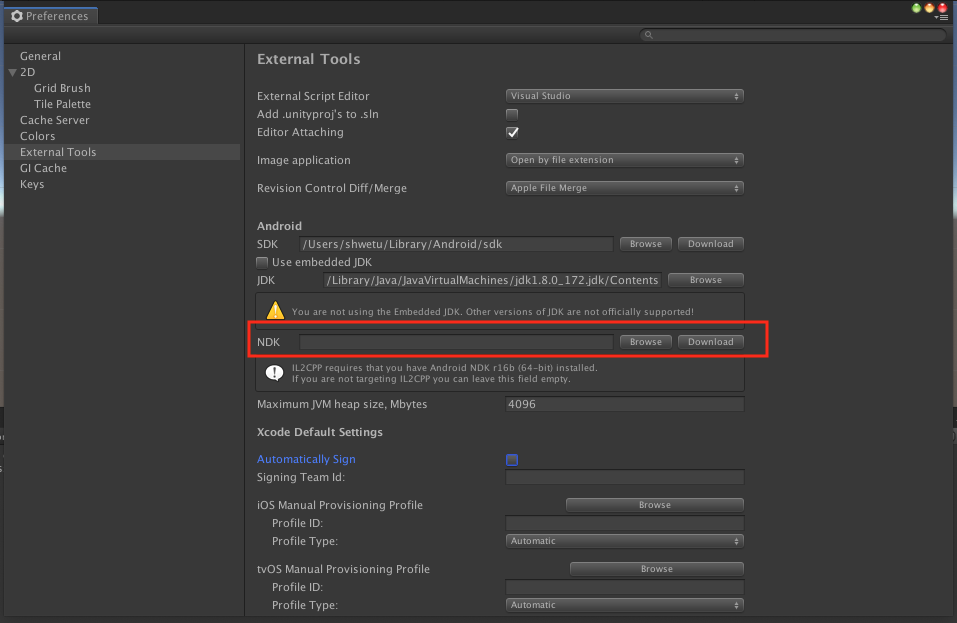
5.7 Now if you try to build, it will fail unless you have required NDK downloaded.
For that Go to Unity -> Preferences.
If you have NDK installed then select proper path or click Download button and it will download it’s required version of NDK.
5.8 Now Create Build and it’s done!!
5.9 Upload your build with android 64-bit support.
I hope you will find this blogpost very useful while adding Unity – Android 64bit support. Let me know in the comment section below if you have any questions regarding this post or any other topic of Unity, I will try to reply ASAP.


