3D Particle Objects
The main objective of this post is to help you create particles of 3D objects like cube, shpere or any of your required mesh.
Step 1 :
Create New blank scene
Step 2 :
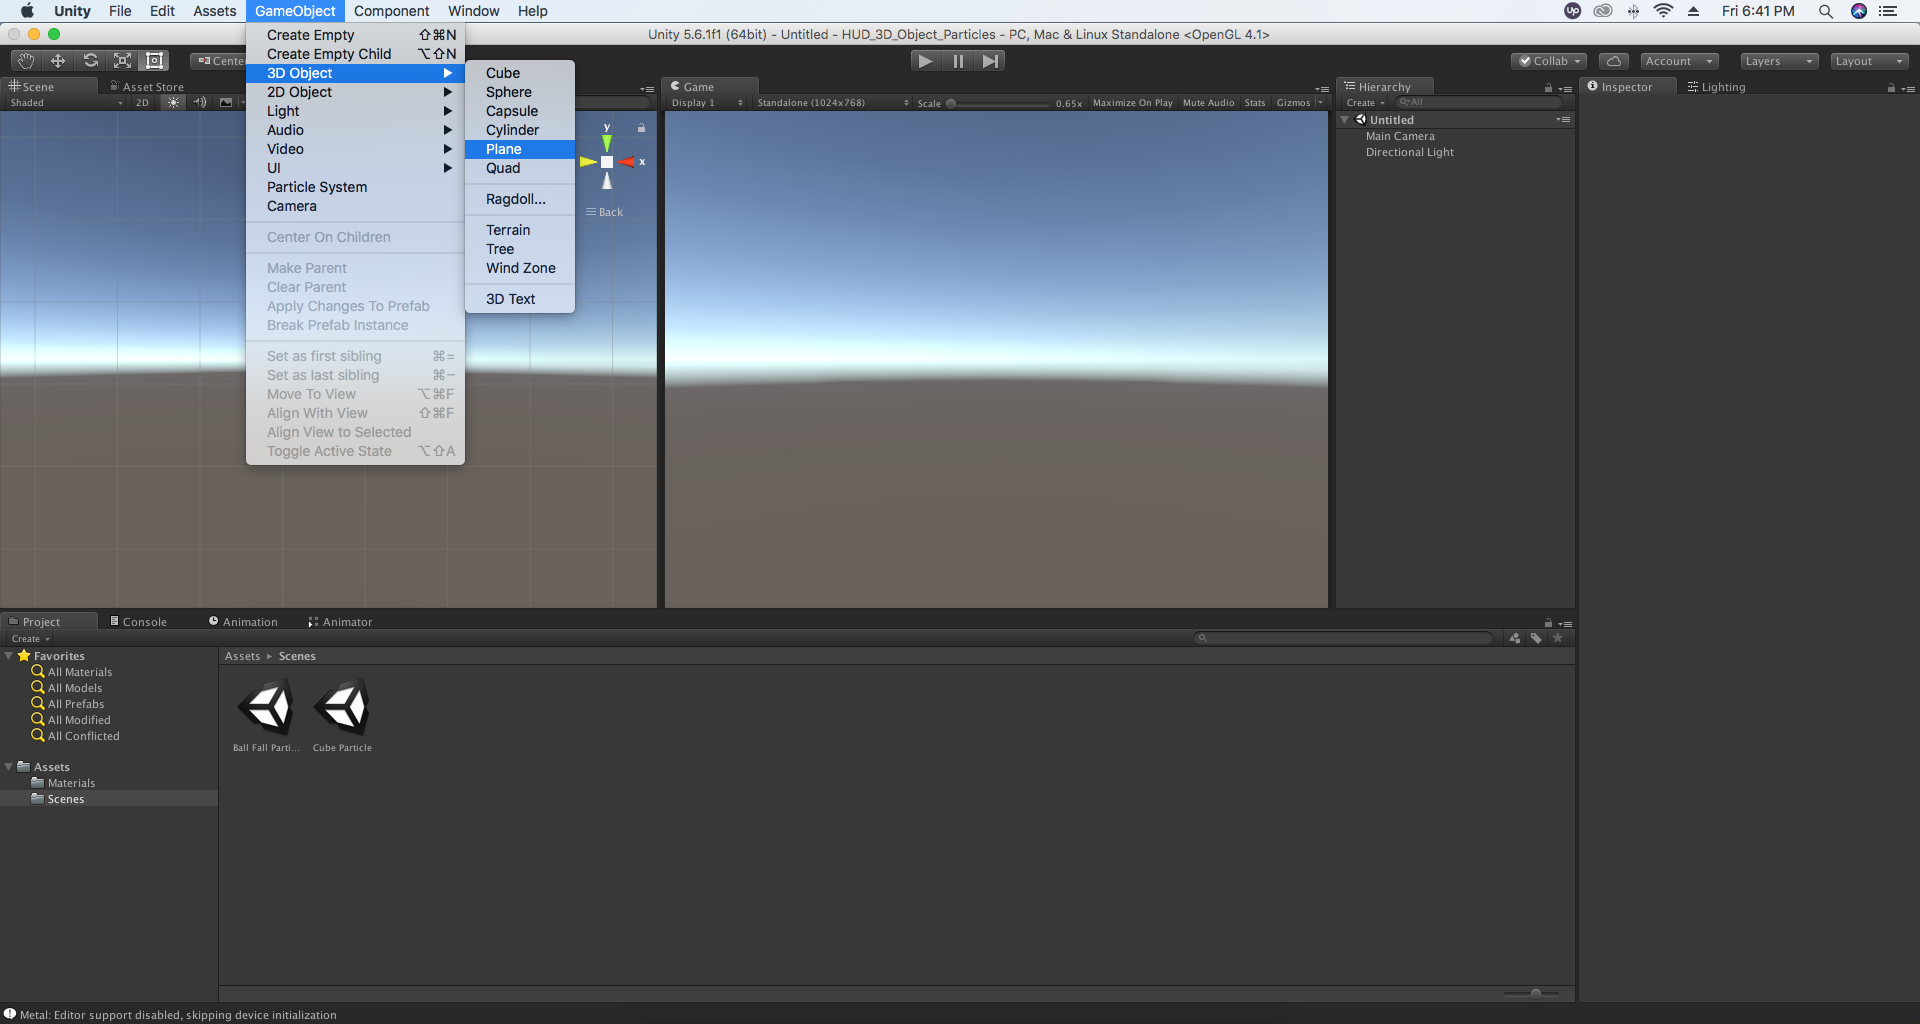
Create Plane for the base
Step 3 :
Set Position, Rotation and Scale.
Step 4 :
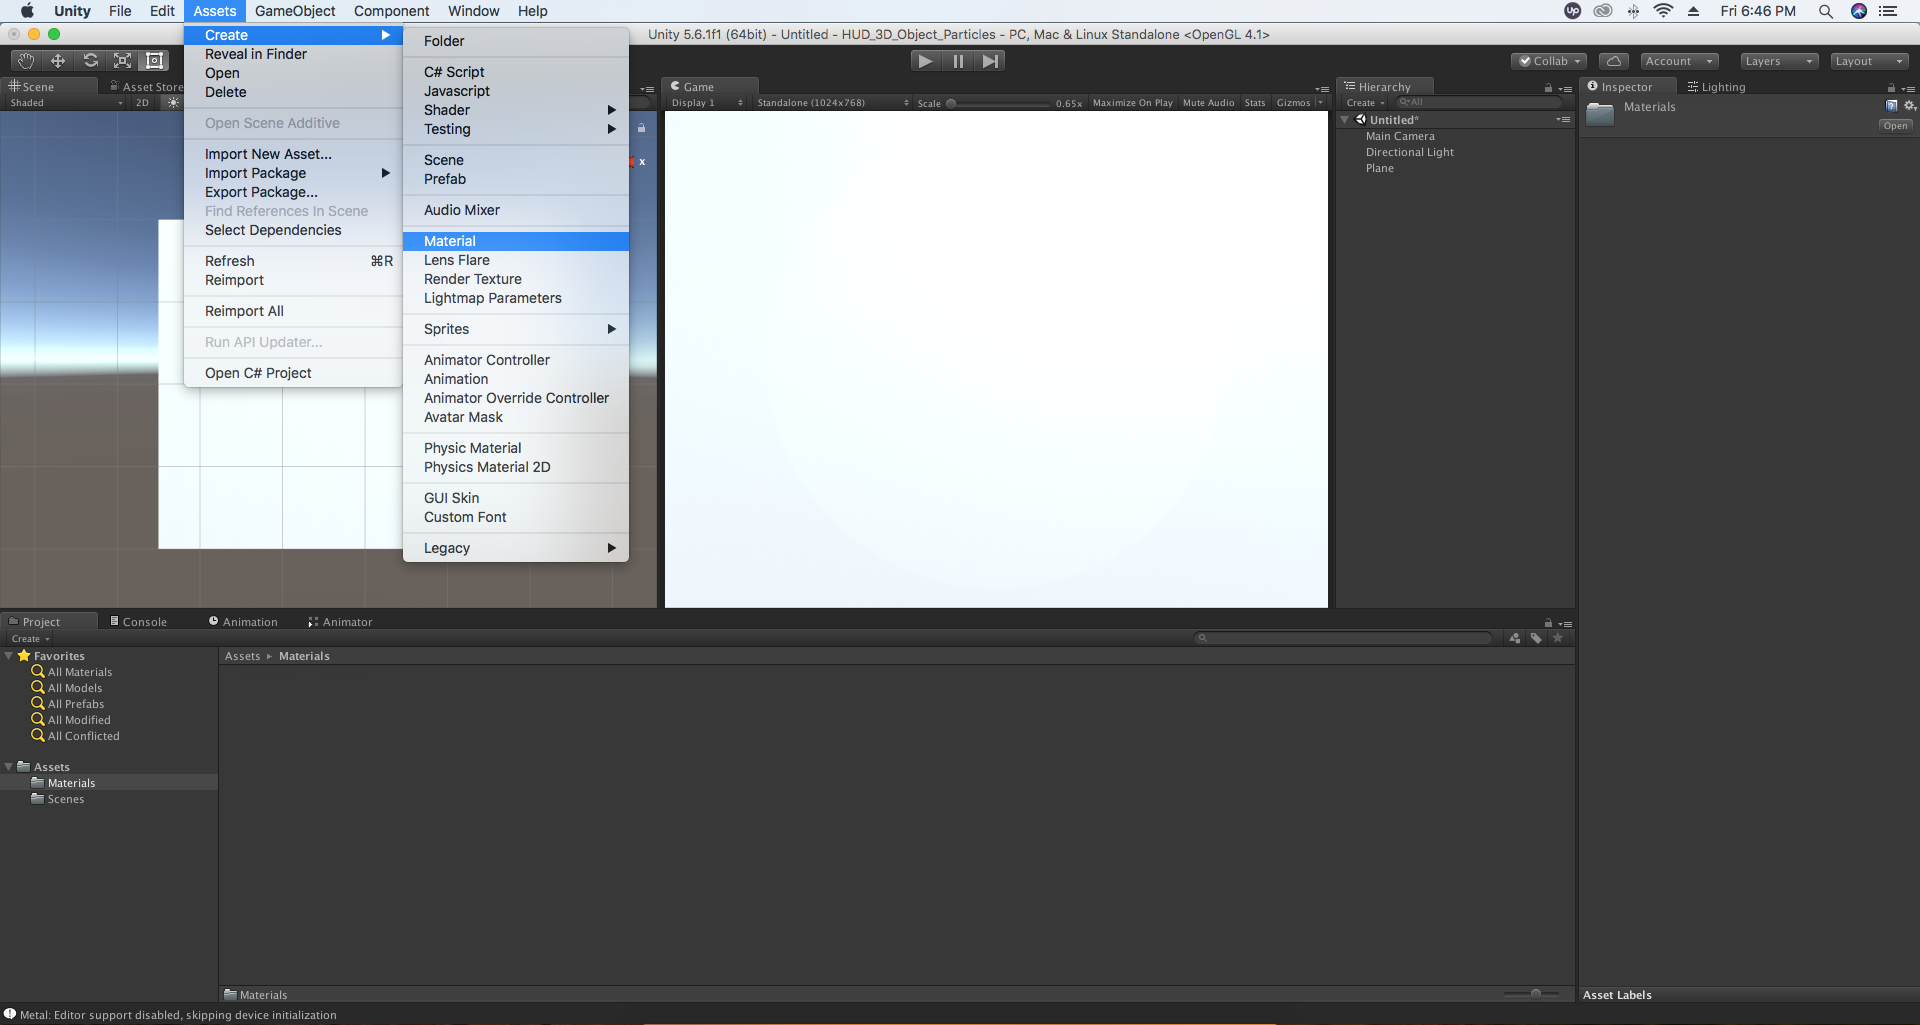
Create Material and name it Base.
Step 5 :
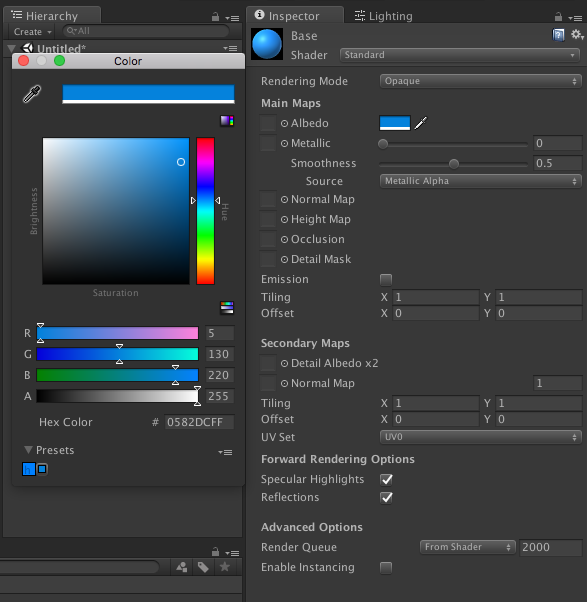
Set albedo to (5, 130, 220) in RGB format.
Step 6 :
Assign this material to Plane.
Step 7 :
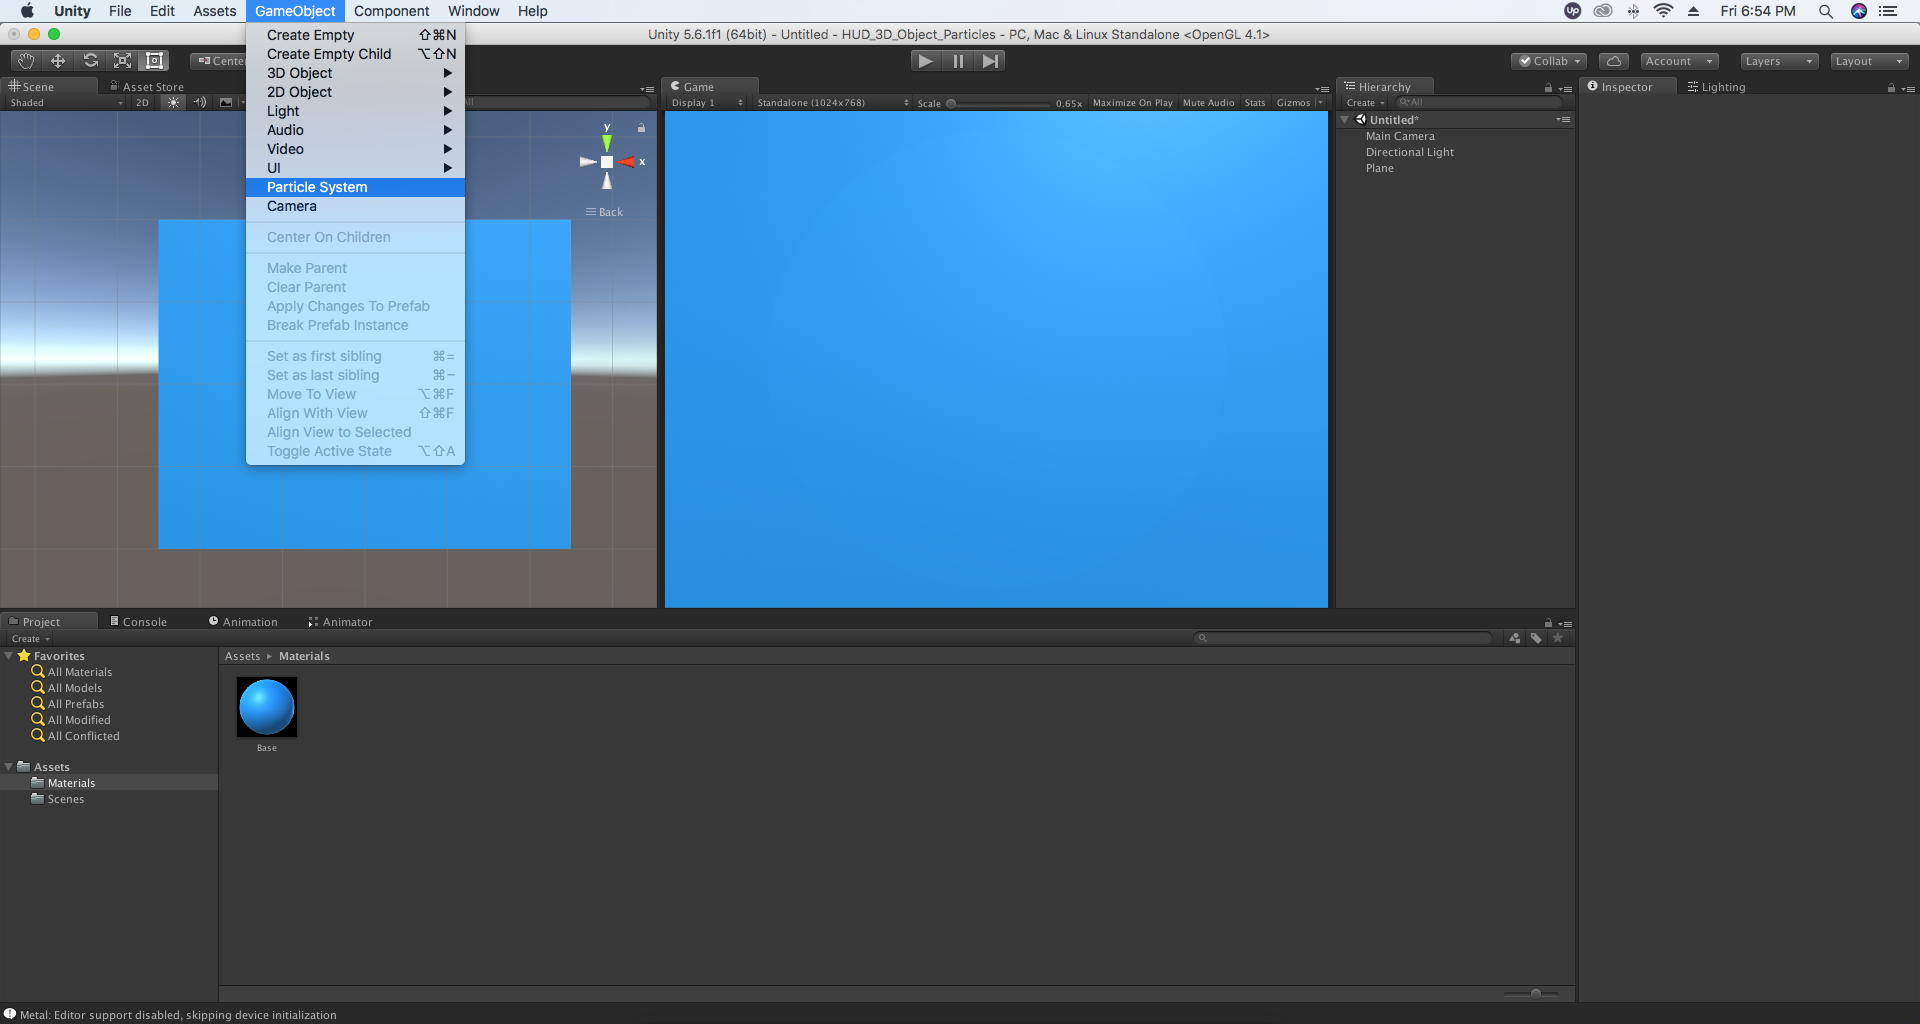
Create Particle System.
Step 8 :
Set Position, Rotation and Scale.
Step 9 :
Create Material and name it Particle.
Step 10 :
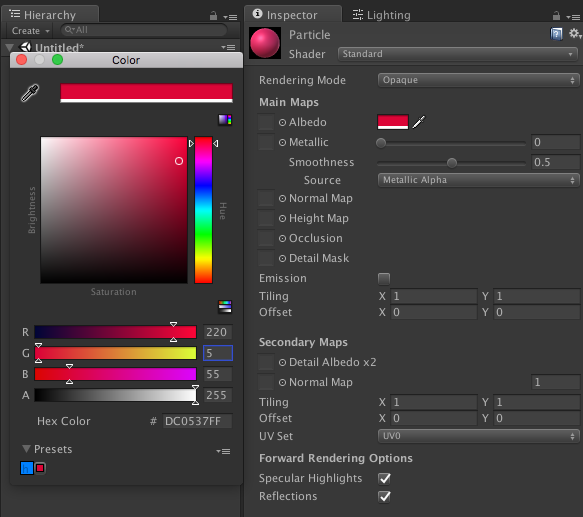
Set albedo to (220, 5, 55) in RGB format.
Step 11 :
Assign this material to Particle System.
Step 12 :
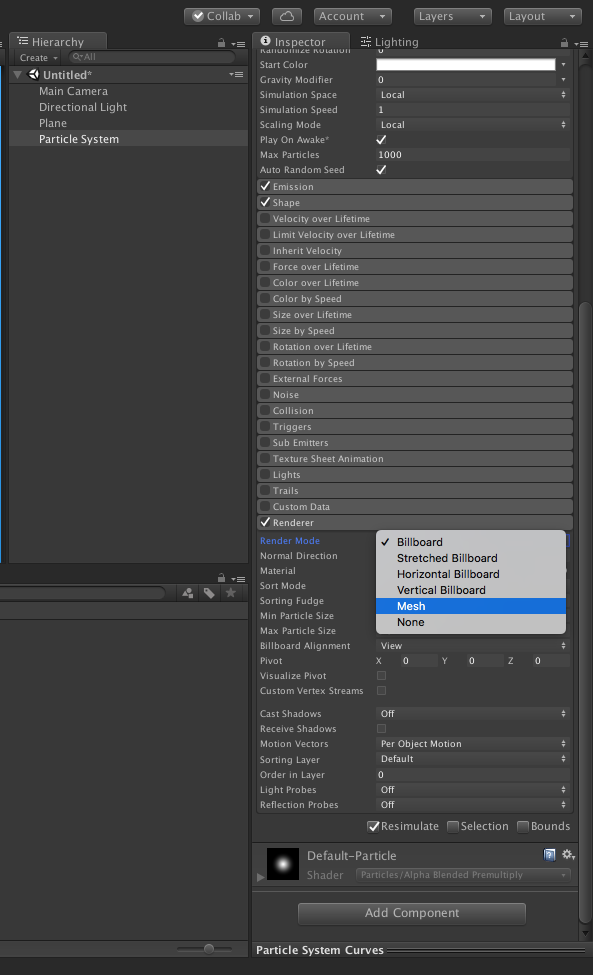
To convert particles into 3D objects change Render Mode in Renderer section of Particle System to “Mesh”.
Step 13 :
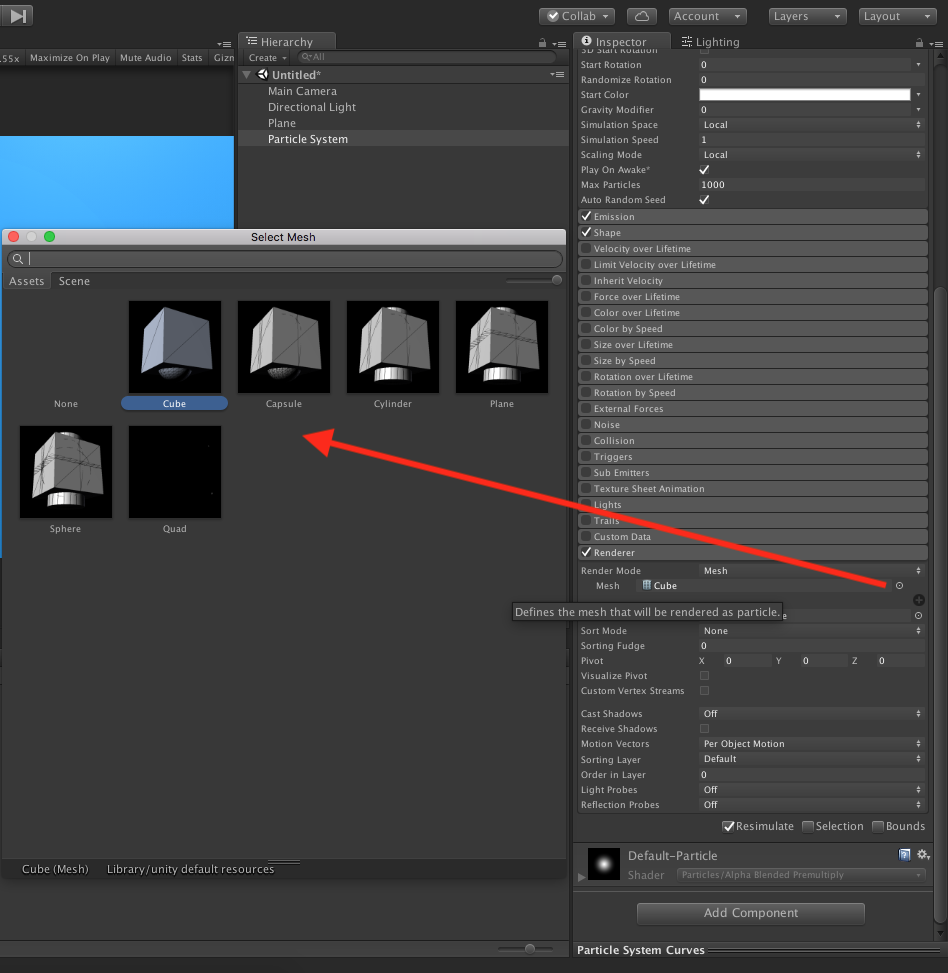
Select Cube in Mesh Section (You can select any like sphere, capsule etc.)
Step 14 :
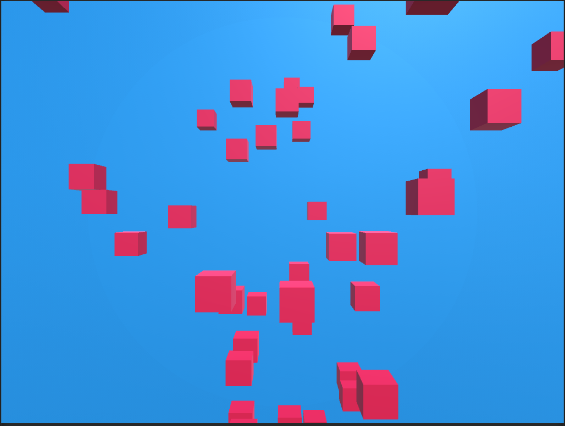
You can see this output till now.
Step 15 :
Reduce Rate Over Time to 2 in Emission section.
Step 16 :
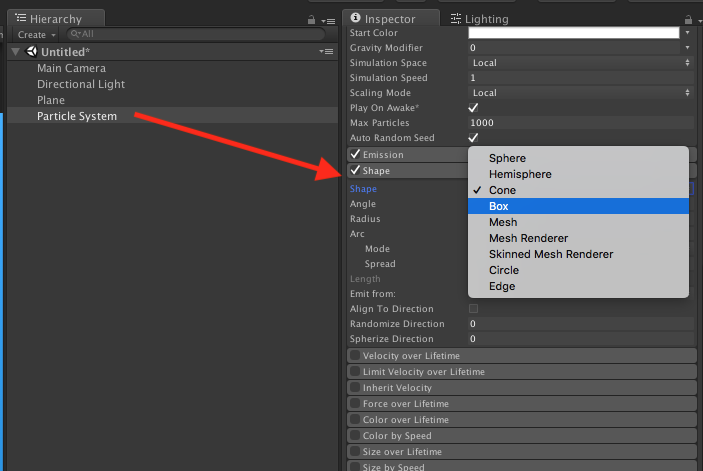
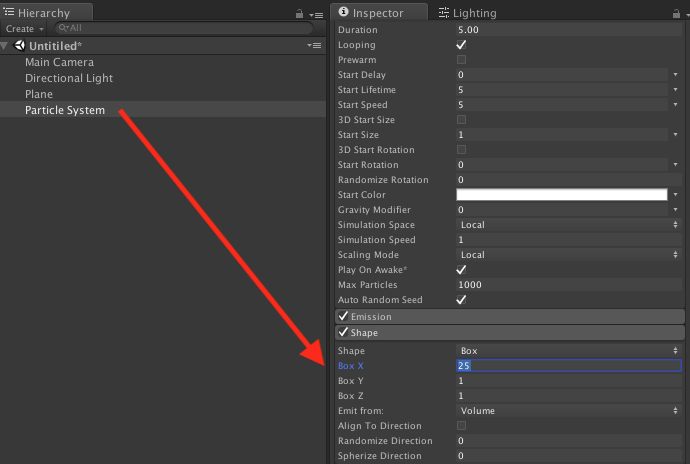
Change Shape to Box.
Step 17 :
Set Box X to 25.
Step 18 :
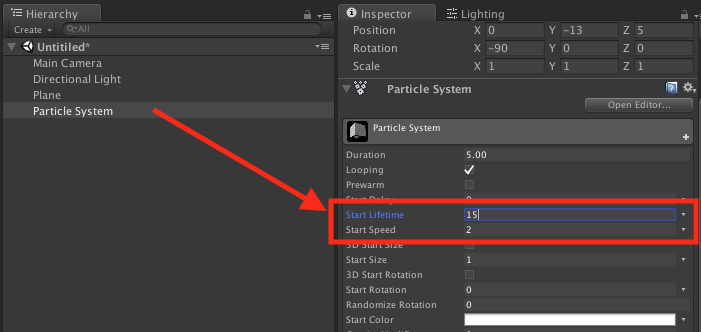
Set Start LifeTime to 15 and Start Speed to 2.
Step 19 :
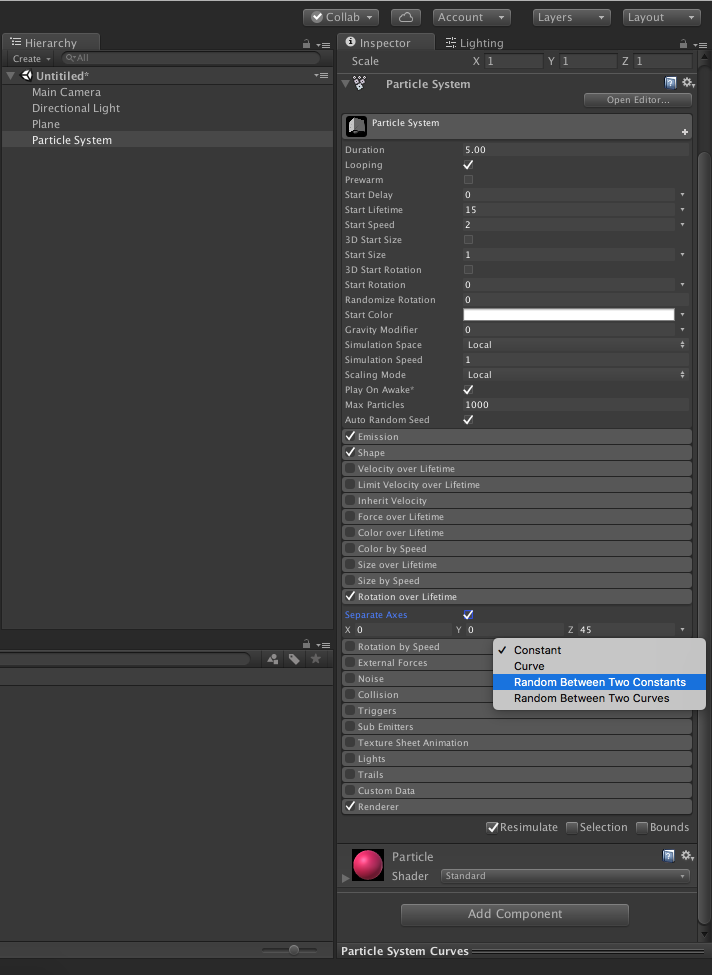
Set Rotation Over LifeTime -> select separate Axes and Select Random between Two Constants.
Step 20 :
Set Axes same as following.
And that’s it, you have successfully created particles of 3D objects.
I hope you find this article helpful while creating 3D particles. Let me know by posting comment if you have any questions.

